Posts

How to Raise Your Cutting Table to Reduce Back Strain

Image
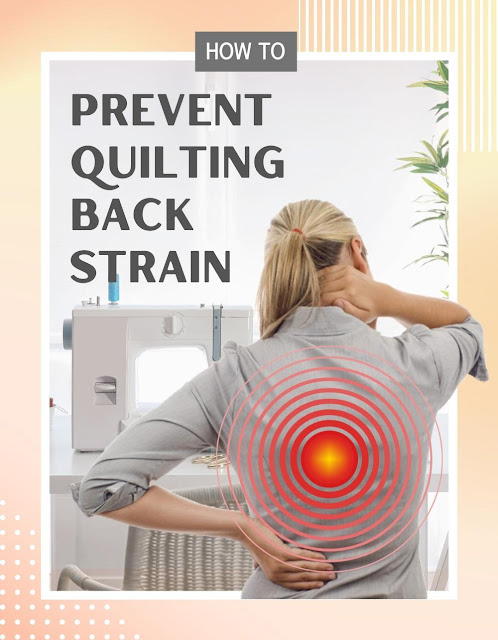
HOW TO RAISE YOUR CUTTING TABLE TO REDUCE BACK STRAIN When I worked as a graphic designer, I sat for long hours at the computer. It was easy to get lost in my work and not pay attention to my body. I paid the price, however, because this caused me to suffer from back pain for years. So, when I started quilting more, it became clear that I needed an ergonomically friendly cutting table. There were several options available to me, but I opted to buy the Linnmon/Finvard table from Ikea. This Ikea table height can be adjusted to several heights with a "peg-in-the-hole system." This table was a great buy, but there are other ways to get a raised table without putting out a lot of cash.   Linnmon/Finvard adjustable worktable from Ikea (Discontinued). FIND THE CORRECT TABLE HEIGHT FOR YOU Measure from the floor to about 6 inches below your elbow. This will give you the proper table height for your height. TYPES OF RAISERS 1.  FOLD-AWAY TABLE AND PVC PIPE You can make most any...

My favourite foundation piecing papers

Image
Anyone who has done foundation paper piecing (FPP) knows how frustrating and tedious it is when struggling with bad piecing paper. I've tried most every FPP on the market. I've also tried various tissue papers, tracing papers, parchment paper, copy papers, phone book paper ... well, you get the picture. After all my research, my favourite FPPs are Fun-dation and Sulky Tear Away Stabilizer. Because I do a lot of FPP for my designs, I was excited to see Fun-dation  brand piecing paper go on sale recently at Amazon.ca  for $5 CDN. I ordered five packages. A package has 25 sheets. I'm glad I ordered when I did because the price went back up to $7.69 CDN (which is still not too bad). Fun-dation  brand FPP is the best I've used. It tears away beautifully, it's translucent enough for fabric placement, and it prints well; I love this stuff. One package of Fun-dation  works out to about 0.31 cents a sheet.  Fun-dation Foundation Piecing Pa...

How to Resize Quilt Blocks and Patterns

Image
Quilt patterns can come in many sizes. But what if the size of the pattern isn't the size you want? Maybe you want a throw instead of a mini quilt or a baby quilt instead of a king-size. To resize your pattern or block, you need to know the percentage to reduce or enlarge the pattern templates. Read below to learn three easy ways to get the percentage you need to resize templates. THREE METHODS FOR RESIZING YOUR QUILTS AND BLOCKS 1. DO THE MATH Below is the very simple formula to get the percentage for reducing or enlarging. ENLARGING : Measure the shortest length of the original block size? e.g. 6 inches What size do you want the new block to be? e.g. 8 inches Divide the new size by the original size, e.g. 8 ÷ 6 = 1.33. Move the decimal point two steps to the right to get your percentage = 133%. Enter 133% into the copy machine to enlarge your 6-inch block to an 8-inch block.  REDUCING : Do the opposite of above. Divide the small size (e.g. 6") by the large size (e...

Halloween Decor 2017: Beautiful Halloween wreath

Image
A couple of years ago I posted a  Halloween floral arrangement that I made for my home. This year, I made a Halloween wreath for my front door. I turn 60 this October and I love Halloween, so I'm having a birthday/Halloween party for my big day. I wanted a pretty wreath on the door to greet my guests. I saw some beautiful wreaths on Pinterest with skulls and  ghoulish stuff, but I wanted a floral wreath. Everything I used to make this wreath is from the dollar store. It cost about $15 to make which proves you don't need a lot of money to pretty up your home for Halloween.  Happy Halloween one and all!

Halloween Witchy Boots

Image
Halloween is almost here again. This is my favourite time of year. Costume parties, treats, tricks, and spooky stuff; I love it all. Today I'm launching my new Halloween pattern Witchy Boots for 2017. This mini quilt is a simple applique pattern that's perfect for a confident beginner. The finished size is 13" x 15" (32.5cm x 37.5cm). The pattern was inspired by the image from the Wizard of Oz (1939) of the Wicked Witch of the East's boots after Dorothy's house crushes her. Dorothy had a whole mess of problems after that. My version looks the Wicked Witch of the East was stuffed in a trash can, but you get the idea. 

Three DIY Pin Cushion Ideas with Tutorials and Free pattern

Image
1. How to Make a Vintage Planter Pin Cushion Pin cushions are an absolute necessity in any sewing studio. You usually don't realize this until you don't have one around when you need it. If you go online or on Pinterest, you'll see hundreds of different variations of a pin cushion. There was, however, one pin cushion I fell in love with. It's the vintage planter pin cushion. I came across these little cuties at Lovely Little Handmaids  and knew I had to make one. I picked up a vintage planter at the flower shop and, in no time, I made this adorable little pin cushion. See the instructions below to make your own. I think they would make great gifts for your sewing friends. INSTRUCTIONS You can probably find one of these little planters at a thrift shop or rummage sale for a few cents. You may also want to check out your local florist shop to see if they have any kicking around from days gone by. That's where I found mine. Step One  To give the pin cushion extra wei...

Little Puppy Placemat

Image
Last week I launched my cute  Kitty Cat placemat pattern. This week I'm introducing its partner, my new Little Puppy placemat. Both placemats are great for kids or grand-kids, but could also be used as hot pads in the kitchen. They are simple to make with basic fusible  appliquè . This pattern is perfect for the confident beginner who wants to learn bias binding and fusible  appliquè .